News: Putting FUN and FRIENDLINESS, FIRST into owning and learning about AMC small bodied cars, primarily Eagles, Spirits and Concords as well as vehicles built in AMC's Mexican subsidiary, VAM.

The AMC Eaglepedia can now be accessed using the buttons found below  This is a comprehensive ever growing archive of information, tips, diagrams, manuals, etc. for the AMC Eagle and other small bodied AMC cars. 

Also a button is now available for our Face Book Group page.


Welcome to the AMC Eagles Nest.  A new site under "old" management -- so welcome to your new home for everything related to AMC Eagles, Spirits and Concords along with opportunities to interact with other AMC'ers.  This site will soon be evolving to look different than it has and we will be incorporating new features we hope you will find useful, entertaining and expand your AMC horizons.

You can now promote your topics at your favorite social media site by clicking on the appropriate icon (top upper right of the page) while viewing the topic you wish to promote.


  • May 20, 2024, 01:45:09 PM

Login with username, password and session length

Author Topic: Priya's SX/4 project  (Read 339469 times)

0 Members and 1 Guest are viewing this topic.

Offline milliard431

  • Eagle Turbo Diesel
  • *******
  • Posts: 1271
  • Thumbs Up 25
    • Robs1980eagle
Re: Priya's SX/4 project
« Reply #450 on: September 16, 2011, 08:11:30 PM »
I think I will ship my 2 Eagles up to your house for the winter. Incase you get bored when yours is done

Offline priya

  • Premium Member
  • Eagle Turbo Diesel
  • *****
  • Posts: 1309
  • Thumbs Up 133
Re: Priya's SX/4 project
« Reply #451 on: September 17, 2011, 01:28:47 PM »
Sure, that's what I need, more Eagles to do  ;)

Offline maximus7001

  • Eagle DL
  • ***
  • Posts: 229
  • Thumbs Up 12
  • Winnipeg, Canada
Re: Priya's SX/4 project
« Reply #452 on: September 18, 2011, 04:00:41 AM »
Believe it or not some progress is being made.  I got all the wheel well trim on yesterday, special thanks to 68AMXGOPAC for getting me the last piece of aluminum wheel well trim.  Most of the exterior is together, excepting the rear spoiler, the mouldings that seperate the lower body colour from the upper body colour, and the various decals, such as the SX/4 door stickers.  Had the car out in the sun yesterday to soften up the plastic wheel well flares to make them easier to install as the plastic has shrunk with age and needs to be pushed into place to insert the various clips and screws.  The car is pretty dusty and the sun wasn't at the ideal angle, but the picture didn't turn out too bad and I thought it was about time to show the current state of the car:


After being unable to find a rear hatch release solenoid my husband found this electric popper in the Princess Auto surplus bin for the princely sum of $5.00:


Hubby was able to mount the gear driven electric popper without even having to modify the hatch at all.  And it works!


I just need to figure out a way to plug the hatch keyhole and then I can mount the spoiler.  From here I'm focusing on the interior.  I've got the carpet mostly installed, a bit of trimming around the shifter to do.  I'm doing some more insulating as well.  The front seats are almost ready to go in, just need some more slight adjustments to the adapter brackets and they'll be ready for permanent installation.

You got a princess auto part number for that popper?
1968 Javelin SST 290
1981 Concord DL sedan, vintage red metallic (now parts car)
1985 Eagle wagon, same colour as the concord (project car/daily driver)
1997 GMC Safari SLT AWD (full time 4x4) G-80 LSD

Offline priya

  • Premium Member
  • Eagle Turbo Diesel
  • *****
  • Posts: 1309
  • Thumbs Up 133
Re: Priya's SX/4 project
« Reply #453 on: September 18, 2011, 12:17:20 PM »
It appears to have been a limited buy in the surplus area, there's no part # in the princess auto catologue.  What I can do is next time I'm there is  see if they still have any and pick you up one if you want.  If I remember correctly it was $5.00

Offline Canoe

  • Eagle Sundaancer
  • ******
  • Posts: 1150
  • Thumbs Up 54
Re: Priya's SX/4 project
« Reply #454 on: September 18, 2011, 08:59:31 PM »
They used to have one under their store brand. I bought one ($20 to $30), but now I can't find it to install it...

Offline maximus7001

  • Eagle DL
  • ***
  • Posts: 229
  • Thumbs Up 12
  • Winnipeg, Canada
Re: Priya's SX/4 project
« Reply #455 on: September 19, 2011, 08:10:56 PM »
It appears to have been a limited buy in the surplus area, there's no part # in the princess auto catologue.  What I can do is next time I'm there is  see if they still have any and pick you up one if you want.  If I remember correctly it was $5.00

Was this the Portage or Panet location?
1968 Javelin SST 290
1981 Concord DL sedan, vintage red metallic (now parts car)
1985 Eagle wagon, same colour as the concord (project car/daily driver)
1997 GMC Safari SLT AWD (full time 4x4) G-80 LSD

Offline priya

  • Premium Member
  • Eagle Turbo Diesel
  • *****
  • Posts: 1309
  • Thumbs Up 133
Re: Priya's SX/4 project
« Reply #456 on: September 19, 2011, 09:57:21 PM »
It was the Saskatoon location, Maximus.

Offline priya

  • Premium Member
  • Eagle Turbo Diesel
  • *****
  • Posts: 1309
  • Thumbs Up 133
Re: Priya's SX/4 project
« Reply #457 on: November 01, 2011, 07:21:48 PM »
Things have been going pretty slow on the Eagle, but I have a few small things done.  I'm pretty much relying on the hubby to fabricate the exhaust system and get the motor running.  He wants to put in relays for the headlight and blower fan switch to save those hard to come by switches.  Unfortunately he's pretty busy at work so we don't get a lot of time on the weekends for him to help with the Eagle.  To top it off we decided it was getting too pricey to keep paying people to store my Corvette over the winter so our last few (and next few) weekends are taken up building this:


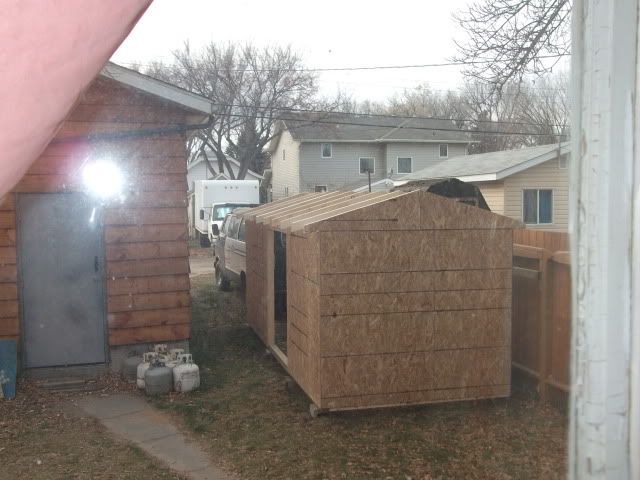
It's going to store the Corvette in the winter and the Eagle in the summer and it's just barely big enough to fit them in.  That opening on the side is going to be a door so I can open the driver's door after I get one of the cars in there.  The weather's been pretty good for late October/early November but it could snow any day and drop to -30 so I've got my fingers crossed for a couple more "mild" weekends. We've spent about $1000 on storage and towing the past two winters so this project will pay for itself quickly

I did get the door panels installed and what an incredible pain that was.  Here's how they looked when I got them:


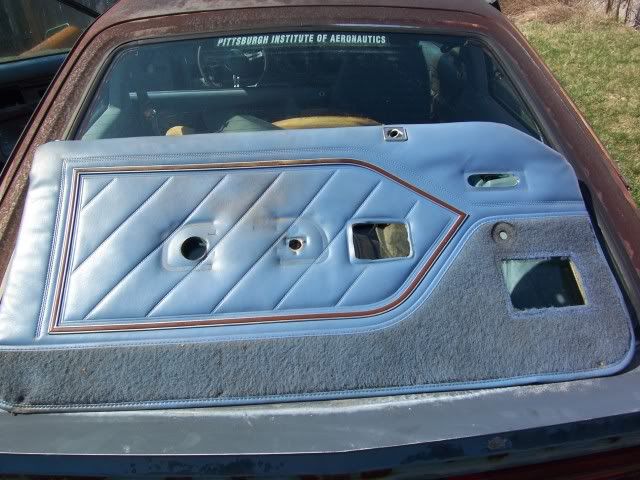
The fiber board on the back was broken around most of the clip holes and in other areas so I pulled back the vinyl and fiberglassed both sides of the board and covered with wax paper to get a smooth finish.  Despite my best efforts I got a lot of fiberglass resin on the vinyl and to my dismay the acetone I used to remove it also removes the colour from the vinyl.  I did my best to remove it and leave as much colour as possible.  I used contact cement to glue the vinyl back on the board and that was a mistake.  I put it on thick with a paint brush and the contact cement makes the vinyl soft and expand and end up wrinkly.  It got a bit better after it dried but its still noticeable, I should have used something else or a spray on contact cement to minimize how much got on the inside of the vinyl.  Hubby suggested that but after the mess with the fiberglass I thought spray on contact cement would also be too messy.

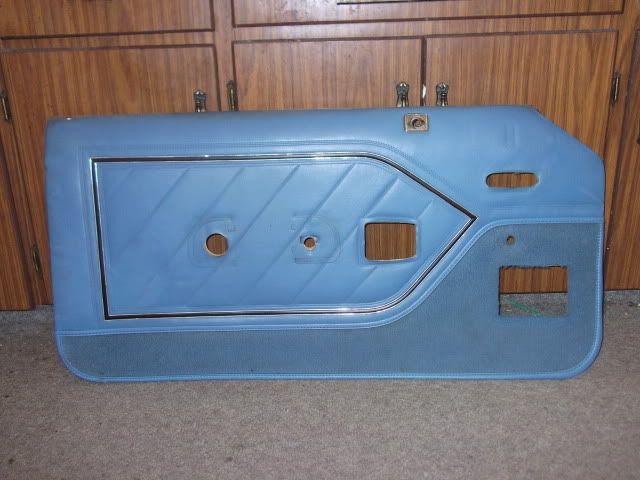
I also decided to "customize" it a bit by painting the brown trim strip black.  Here's the panel after repairs and cleaning:


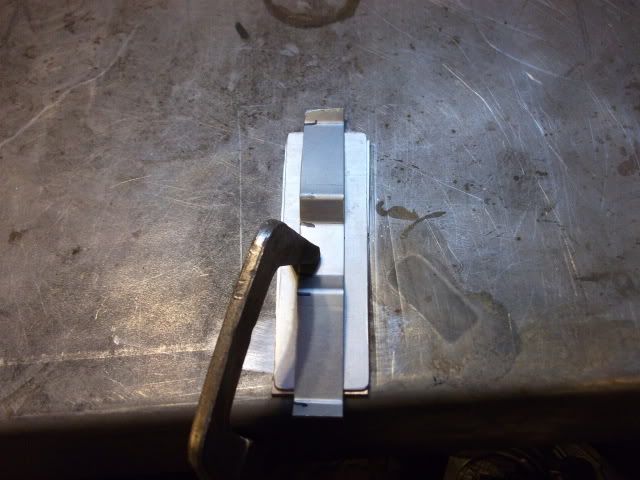
My car doesn't have power windows/locks so I had to do something with the hole in the panels for the window/lock switch.  I decided to make little plates out of aluminum with my name on them and hubby fabricated them for me by tig welding this clip on the back:


After sanding with 220 to give them a brushed aluminum look I took them to the engraver and $50 later they looked like this:


So, after that it was off to install the panels, I'm thinking 6 clips and 4 screws, 5 or 10 minutes - boy was I wrong.  Turns out the fiberglass added enough thickness to the board I couldn't get the clips over it and spent hours re-bending them and trying to force them onto the board.  After that I went to install and got four of the clips in and the other two were not close to the holes in the door, it was like the door panel had shrunk like the other interior parts had.  So, it was back into the house and carve away part of the fiber board to move the clips over and then fight again to get them to slide onto the board. I can't believe how much trouble this interior has been to put together!  All in all it took me three afternoons to get the two door panels clipped and screwed into place but here's how it all looked together, not bad:


I also got some NOS "SX/4" decals and put them on along with mouldings as close as I could get to the original that seperated lower body colour from upper:


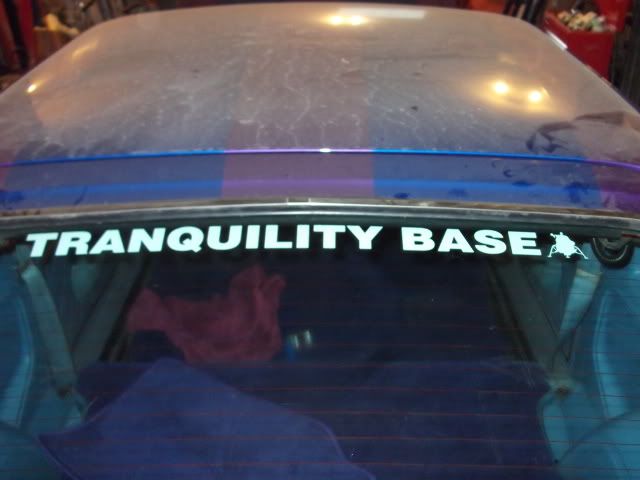
I had some decals specially made for the car.   Hubby suggested this one for the hatch window (I can't believe how dusty the car's gotten since paint!):


And being a Ford girl at heart I couldn't resist this one for the front fenders:
« Last Edit: November 03, 2011, 04:36:42 PM by priya »

Prafeston

  • Guest
Re: Priya's SX/4 project
« Reply #458 on: November 01, 2011, 07:42:10 PM »
When I first saw the shed and you said it was going to be fore a car I was like what...it's barely big enough for a motorcycle! :) Great idea with the door for the door!

The decals look great. And the panels look good too. If you wouldn't have said anything I wouldn't have known any better. Don't beat yourself up. They look good and the name plates was a nice touch.

Offline priya

  • Premium Member
  • Eagle Turbo Diesel
  • *****
  • Posts: 1309
  • Thumbs Up 133
Re: Priya's SX/4 project
« Reply #459 on: November 01, 2011, 08:27:58 PM »
Thanks, Prafeston.

68AMXGOPAC

  • Guest
Re: Priya's SX/4 project
« Reply #460 on: November 02, 2011, 09:16:33 AM »
They look great Pryia !! You two have done such a nice job on it all.The name plates are a great touch. I noticed one day in the MoneyPit II, that Smitty had a little name plate or something put behind one of the little rectangular spots below the speedo. It simply says "SMITTY" , lol, I laughed when I saw it and it remains there still, like a tribute I guess.
I built a small garage like that , on my side door I made it like a gangplank and it dropped down as a ramp, weighted for ease of use, the other end was just wide enough for a 8' garage door and the frameing needed for the rails.
Nice job !

Offline shaggimo

  • AMC Eagles Den Addicted
  • ********
  • Posts: 1952
  • Thumbs Up 90
  • When "6" just won't do.......
Re: Priya's SX/4 project
« Reply #461 on: November 02, 2011, 09:57:34 AM »
 8) those names plates look great! As always, awesome work!  :occasion14:
88 xj cherokee- ((4)(4))2
81 malibu 4dr- Identity Crisis
81 SX4- gf's
84 Eagle 4dr sedan- it followed me home... ::)
http://www.cardomain.com/id/Oldsmoletic
CNY

Offline priya

  • Premium Member
  • Eagle Turbo Diesel
  • *****
  • Posts: 1309
  • Thumbs Up 133
Re: Priya's SX/4 project
« Reply #462 on: November 02, 2011, 11:36:47 AM »
Thanks 68AMXGOPAC and Shaggimo!

rohnk

  • Guest
Re: Priya's SX/4 project
« Reply #463 on: November 02, 2011, 12:07:40 PM »
Wow Priya you are doing great! Your Eagle is one of the reasons I bought mine last year. I hope to complete mine with as much love and attention to detail as you have shown yours. I am also starting with a white SX/4 and it may stay white. We will have to see.

Thanks for sharing!

Offline priya

  • Premium Member
  • Eagle Turbo Diesel
  • *****
  • Posts: 1309
  • Thumbs Up 133
Re: Priya's SX/4 project
« Reply #464 on: November 02, 2011, 12:34:56 PM »
No problem, Rohnk, thanks for the encouragement :)


SMF spam blocked by CleanTalk